 Skip to content
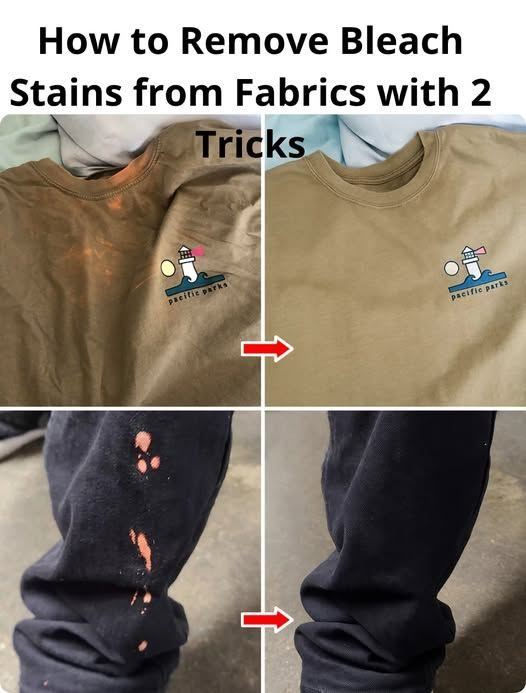
If exact color matching is difficult, you can turn the stain into a design feature instead of hiding it.
🧶 What you can do:
- Create a tie-dye effect
- Add fabric paint designs
- Use embroidery or patches
- Apply gradient or splatter effects
🖌️ Steps:
- Identify the bleached area.
- Choose complementary colors or patterns.
- Use fabric paint or dye to expand the design beyond the stain.
- Blend creatively so the stain becomes part of the pattern.
- Let it dry and set according to product instructions.
🌈 Why it works:
Instead of fighting the stain, you integrate it into a new design. This is especially popular for casual wear and denim items where creativity is welcome.
⚠️ Important Things to Know Before You Start
Not all fabrics react the same way to bleach or dye:
- ❌ Delicate fabrics (silk, some synthetics) may not hold dye well
- ❌ Very dark fabrics may be harder to blend evenly
- ❌ Large bleach stains may require full garment recoloring
Always test a small hidden area first before applying any product.
🧠 Bonus Tip: Prevent Future Bleach Damage
Prevention is just as important as repair. To avoid future stains:
- Dilute bleach properly before use
- Never pour bleach directly onto fabric
- Wash bleach items separately
- Use gloves and controlled application methods
Even a small drop of concentrated bleach can permanently alter fabric color.
🌟 Final Thoughts
Bleach stains don’t always mean the end of a garment. While you cannot technically “remove” the loss of color, you can often restore, camouflage, or creatively transform the damage into something wearable again.
The key is to act quickly, choose the right method for your fabric type, and stay patient with the process. In many cases, what starts as a laundry mistake can end as a customized or refreshed piece of clothing.
Sometimes, the best fix isn’t hiding a mistake—it’s turning it into a new style. 👕✨